
How to flash you SD card without a dedicated Windows 10 machine
Goal
Get Windows 10 IoT core on a medium that is capable of booting a raspberry pi 2.
Requirements
- VM running Windows 10 Preview.
- Micro SD card. A minimum card is Class 10 with 8GB of storage.
- An account with the Windows Embedded Pre-Release Program
- The most recent image for the Rasberry Pi from the downloads on the site above.
- A USB SD card reader.
- Install the hardware development tools specifically the ADK. For more on the Hardware Dev Kits
Problem
According to the documentation from Microsoft
I figured there was around this, as you are just flashing an SD card with an image.
Whats in the embedded download package
- Flash.ffu <- what we really care about
- ReadMe.txt <- for the moment a waste of diskspace
- WindowsDeveloperProgramForIoT.msi <- you will need to install this
- license.rtf <- whatever
Notice that “Flash.ffu” file is not the usual .img. So all the usualy trick like “dd” and other commands are just not gonna work on it. The “.ffu” extention is apprently used in manufacturing of windows phones. I am sure there is way more to it, but I am not going to go into all of that. If you want to no more the file format description seems like a good place to start.
Ok get on with it, how do I do this
Update: this works on Windows 8.1 as well
- Insert the SD card in to the USB card reader, and insert that into an available port.
- Make a copy of the Flash.ffu file to someplace easy to get to ie “c:\Users<your username>\Desktop”
-
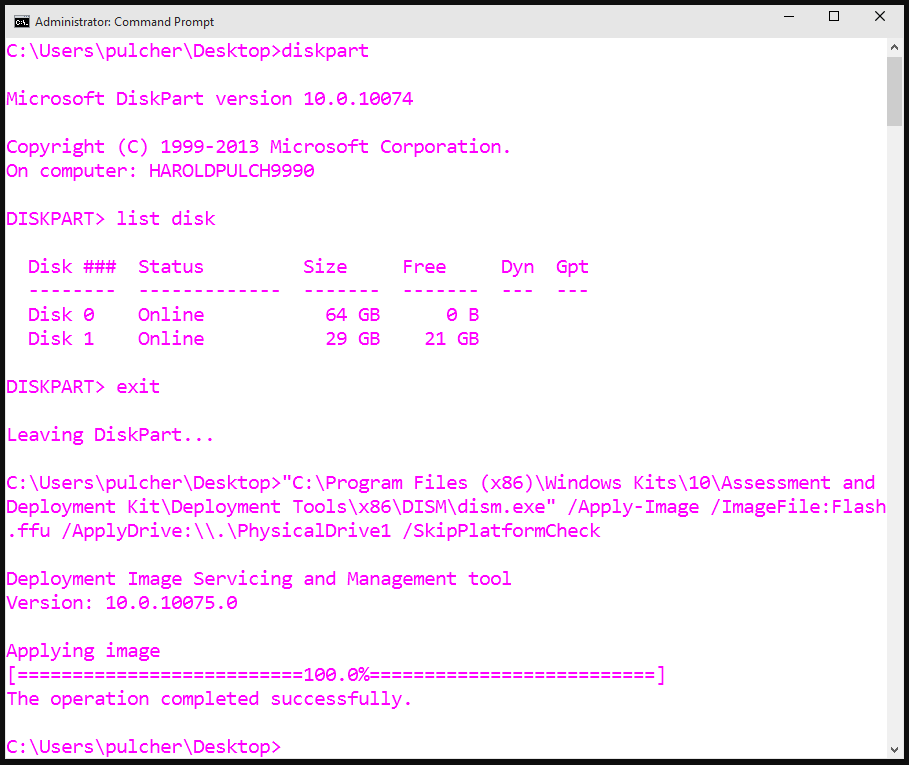
Open an administrator command prompt and issue the following commands:
diskpart
list disk
exitIn this case my SD card is disk 1. The ‘1’ being really important.
-
Now execute the dism command. This is a bit more difficult than it seems. You need to find the right ‘dism’ to execute.
This is the reason for the ADK requirement, as this dism knows how to write to the SD card.
My was locted here:
C:\Program Files (x86)\Windows Kits\10\Assessment and Deployment Kit\Deployment Tools\x86\DISM\dism.exe
If you are successfull then you screen should look something like this:
All that is left todo is eject the SD card and insert it into the raspberry pi 2.
If you need help with that, I have other blog posts coming your way.
